Showing posts with label Patterns. Show all posts

Thursday, May 3, 2012

Textile Thursday *ahem* and Weaving Questions Answered

Ok so this Thursday kind of snuck up on me, I have been sick for most of the week so most of my work is still exactly where it was a week ago. My weaving scarf still isn't fixed and my knitting has not progressed an inch! So I will leave you with a short post and a wonderful picture of my loom FULLY warped!! 

Warp still attached to dowel
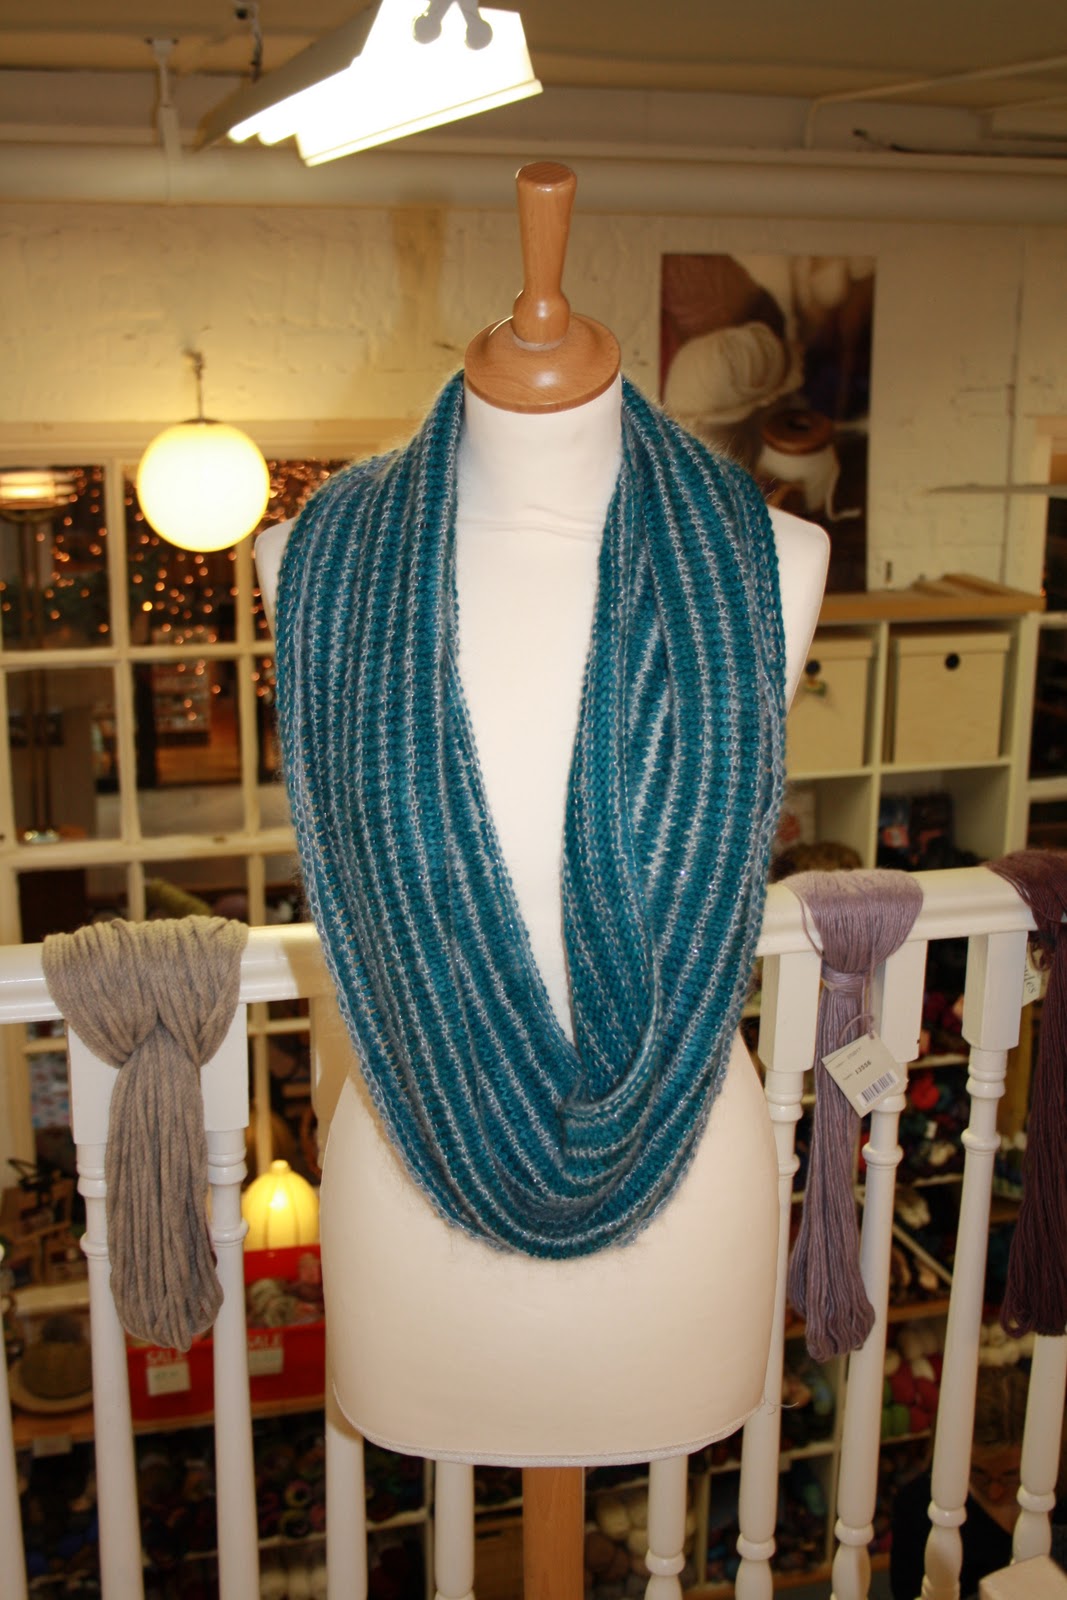
and on the loom


Isn't she gorgeous????? This yarn is an alpaca boucle yarn in blue, navy and grey. When this grows up it will be a toddler blanket of 32" x 42" and snuggly to boot. I am however a bit fearful that it will be too much like a towel but we will see. The yarn has been sitting in my stash for about a year now and its time to shine has come. (I was going to use a Logan's Run phrase here but I figured my sense of humour is an acquired one and I don't know you guys well enough yet!)

I guess I should use this post to answer some of the questions I have been getting about looms.

Is it really expensive?
To buy the loom like anything else it can be budgeted to what you can afford. You don't have to go for a 32 inch or 42 inch loom. Mine was around 190 euro but its the second biggest Rigid Heddle you can buy. The smaller looms are cheaper.

Weaving itself is as expensive as you make it. My Brown Sheep scarf was under 10 euro with the beads. the Noro scarf was 17.95 and done in an afternoon and my Opal scarf was just under ten. Yes my Christmas this year is sorted :)

Is it really difficult? 
No not really, I completely agree with most people that if you can knit you can weave. The thought process is similar, instead of using maths to size a garment to fit you, you size a rectangle or a square to what you want. Mostly its time, patience and logic is all you need. If your looking for a particular type of math or calculation for a project, I will do my best to point you in the right direction, remember Excel is your friend.

There are some great blog posts out there on weaving math and calculating warp and weft so I really don't want to take away from them. Haley Studio has an online calculator here and of course Weavolution has one here. Feministy has some Excel spreadsheets here just to name a few :)

I have a loom but I just can't put it together....
There are many manuals on the internet. Most importantly you need to find the manufactures mark, name or brand of your loom. All Ashford looms come with step by step instructions and then some YouTube videos just in case you *loose* the instructions, so I really can't recommend these guys enough though there are other types of looms out there. In this case search engines are your friend and you can always throw a post up on the forums of Weavolution, these guys are great. 

 Here in Ireland its hard to get your hands on a supplier so this is generally the limiting factor. Kromski (harp), Schacht and Cricket are all different brands of looms and obviously different prices. If your interested there are many comparison sites out there from people who have woven on a few looms for example spinninglizzy has some great pictures on the Kromski and Schacht looms. 

Can I weave with any yarn?
Well this depends on your loom, in particular your heddle (or reed) the dpi indicated on your reed with tell you the thickness of yarn (wpi) that you can use.  The knitters loom in particular comes with wide dents so that knitting yarn can be used, though some worsted weight and chunky yarns are going to give you an almost bulletproof fabric. So yes you can use your stash if you want. I know Master weavers will say that RH looms or lap looms are toys and in comparison to their art they are but your loom is either your profession or your hobby and how you use it is up to you. Craft is all about trial and error and don't let anyone tell you any differently, as long as your having fun and enjoying your project then keep on loomin'.

Are there Weaving patterns?
Yes they are called drafts and you can download some free ones from interweave from http://www.weavingtoday.com/. Ravelry has not opened up on drafts yet (crosses fingers and wishes really hard they will soon) but there is a section on peoples project pages where you can see what drafts they used. Again I'll point you in the direction of  Weavolution for some more drafts. 

Reading weaving charts is another matter entirely so I suggest taking a class if your really interested.

:) And that is it for today folks...
Please leave a comment if you have any more questions, I'll be more than happy to point you in a direction if I don't know the answer. 

Tuesday, March 27, 2012

Autumn Dreams Pattern


A few people have been asking for the Autumn Dreams Cowl pattern so you can find it on my pattern page above or on Ravelry here.

Please note that I am a knitter so please forgive any crochet errors. I did my best to insure it was accurate and I hope this is what you where looking for. For those of you looking for the yarn I purchased it here.

I finally added some more of my patterns as a collection which you can find here. I will be working on more patterns and my blog this week so keep an eye out.

Tuesday, January 31, 2012

Grrrrrrrrrrrowl Cowl

Well hello there knitty friends, I know its been a while since I posted anything and I am a whole 1 day ahead of schedule but here goes.......,

In keeping with my new years resolution with cowl pattern releases let me introduce you to my first cowl pattern for February....the Growl Cowl:

(picture by jewelandarlin)


This is a textured wrapped cowl made from 2 lovely skins of Mirasol's Kutama, 50% Wool, 50% Alpaca squishy goodness. This is an extremely warm cowl for a loved one and with that cold weather front setting in this is a perfect weekend knit. If you ask me this is the perfect Valentines gift for him,I bet even Bear Grylls would be jealous!!!

The best part is that this pattern is absolutely free and is currently one of the in house patterns at This Is Knit and you can also find the pattern over here.

I hope you like it, Enjoy!!!
Nadia

Friday, January 6, 2012

Cowl #2 - Noni

Well as I said January was going to be a busy month over here and without delay can I introduce you to Noni:


Noni was designed for my sister Fiona who happens to be called Noni in our house and I thought it fitting to name the cowl after her. One of the great things about this cowl is that it is just so versatile. I love garments that you put time in to making that you can wear just about anywhere. Throw them in your bag and they are ready to go. Noni can be worn as a cowl (long or short), a snood, a wrap to the side or front and with the beaded inserted ties can be pulled into a top like this:

In fact there are so many ways I will post a few photos at the end of this blog post. One of the other amazing things about this cowl is that it is incredibly soft. Yip this is no ordinary cowl, she is made from 1 skein of Malabrigo Rios and one skein of Debbie Bliss Party Angel so it really is like wrapping yourself in pure luxury. The other great thing is that both yarns have many colorways that you could make this unique to you.

One other point I would like to discuss in this post is shawl pins. Now I know that many of you will laugh at this but I have just found these magnetic nova steel pins that are in This is Knit (please don't laugh I really didn't realise they were magnetic) Just look how pretty this leaf design is:

and best of all no holes in your knitting, FANTASTIC! Ok now I am going to bombard you with pictures of my cowl. It is currently being uploaded to Ravelry as we speak.


Aint she a beaut!

Wednesday, January 4, 2012

New Year - New Pattern

First of all a very happy new year to you all, I hope you had a wonderful Christmas and New Year. I have been very busy working away with my little elves so that 2012 could be a fresh start to all things related to T. Bunny Knits. There have been a few changes and some hard work going on, so I hope you all enjoy things to come

In December I decided that 2012 for me was going to be the year of the cowl. Yes that's right the cowl. Ladies and gentlemen, I do believe that the cowl has not gotten the recognition it deserves over the years, so every month here at T. Bunny Knits there will be at least one cowl pattern from myself. Now January being the bleak month it is, I have decided that  there will be 2 cowl pattern releases along with some other accessories over the month. So without further delay I give you the first cowl pattern of 2012:

Ruby 


Ruby is an emergency winter knit for those surprise post xmas birthdays or when the weather catches you off guard and your standing at train platforms and bus stops trying to keep warm. Knitted on 15mm needles and 3 skeins of Polaris, if you grab your yarn on the way home Ruby is ready for you to go to work with the next day. Constructed from garter stitch with seed stitch details its a fast knit but will keep you interested. You can find ruby to download here.

Now another change here at T. Bunny Knits, is that for some of my pattern releases I have allowed some fellow knitters to sell the finished garments from my patterns and these can be found over on the T. Bunny Knits etsy shop here.

And finally.....over on the T. Bunny etsy shop you will also find some of my stitch markers like the ones pictured below. If you keep an eye out over the coming months you may even see a few more surprises!.

Friday, December 10, 2010

Free Cowl Pattern for Xmas


To cheer up a rather bleak December, I thought I would post this pattern for a quick knit chunky mobius cowl. It also has the advantage of being a stash buster of a knit using only 2 x 50g balls (198 yards) of bulky 12 ply yarn. Here I used Debbie Bliss Glen as the colour gradient in the yarn gives a nice texture to the double seed stitch and allows it to be soft and snuggle friendly at the same time. So for those of you looking for a last minute knit for the big day this could be right up your tree :)

Materials:
 Size 6.0 mm (10 US) circular needles
1 Stitch marker
2 Skeins of bulky 12ply yarn
Contrast waste yarn for I-cord if required.

Gauge: 16 sts x 20 rows = 4 inches in double seed stitch.

Double Seed Stitch Pattern:
Row 1: K1, P1 to end of round
Row 2: P1, K1 to end of round
Row 3: P1, K1 to end of round
Row 4: K1, P1 to end of round.

Pattern Instructions:
1. Cast on 100 stitches using the moebius cast on.
2. Start the double seed stitch pattern as described above and work in pattern until piece measures 6 inches. (At this point due to the yarn I rotated each ball every 2 rows to obtain an overall blended effect)
3. Knit one round (use one ball of yarn from now on if using gradient yarn this allows for an edging trim contrast colour).
4. *K8, K2tog, yo* to end of round
5. Knit  one round.
6. Bind off loosely.

If you want to place the I-cord as shown opposite, cast on 3 sts and work an I-cord until it measures 12 inches in length and sew on as shown opposite or use your creative side, you never know what happens when you start to play with an I-cord.


Tuesday, November 23, 2010

~ Pattern Launch and KAL (A Guide to Scarf Knits....) ~

Well I guess this has been a long time in the making but a few of my patterns are available for download from here or you can browse my pattern page. As more objects finish testing, more links will go live but for now I just wanted to say a huge thank you to whirl123 and Rosmeary for all your help over the last few months. Whirl123 (aka Wendy) your amazing and one day I aim to be as web efficient as you, it just may take me a while.Over the next while I will add more patterns slowly to Ravelry but for now with everything that is happening I'm delighted with the mails and response from people (its all helpful).

To change the subject ever so slightly, my KAL project is taking its time but now that I have a little free time this week, Ill get right back on the needles. So for those of you who don't know the constant knitter is running a KAL this November and it is the gorgeous lace-ribbon-scarf by Vernoik Avery (Knitty spring 2008) . Now scarf knitting to me has always been a little tedious because I get halfway and I'm bored but this scarf is actually a fun TV knit with changes every 11 rows to keep you interested. I myself had a few false starts with the pattern but if you check out the forum, you will see that almost everyone had some problem or other, so without further a do here is my guide to scarf knitting:
  1. Always have tea / chocolate and a stash of movies / tv you want to catch up on.
  2. If need be, use your scarf project to convert your unsuspecting housemate / loved one into learning the craft and end up getting them to knit/ crochet some of it for you (heh heh)
  3. If number two fails try bribery with chocolate from step one, ensuring the person that the scarf knitting will be "therapeutic".....................
  4. Order your children to do a few rows as punishment!! (warning this only works on scarves that are easy to knit and your child may end up hating the craft altogther)
  5. You could conduct a scarf swap with someone (again bribery works well here).
  6. Teach your pet how to knit or crochet ( I have actually thought long and hard about whether or not I could teach Berry how to hold needles or if I tied them to her paws would she make anything)
  7. Use thick yarn and large needles the project will go faster.
  8. Find a friend who wants to knit the same scarf as you and have a sort of buddy system, this works really well.
  9. Now this final step should only be used if your making the scarf for a friend or loved one who wanted the scarf because of a magazine or some famous person was wearing it and its "the" new hot fashion trend... knit/ crochet the scarf so they can see you working on it and say how much you would love that cup of tea or dinner *ahem* and say you would stop knitting but this scarf is has to be so long it will never be finished in time for *......insert relevant event here........* (use puppy eyes at your own risk) they will feel guilty and offer to make you tea or dinner or if your lucky offer you something nice in return for your knitting / crochet skills
and finally because I think this blog post is too long already, just enjoy the mindless knitting of a scarf, if you can't, just remember all those times you worked long and hard on intricate lace details or figuring out new cast - on or bind off methods, use the scarf as a treat to your knitting self. It will be over all too soon and in the end we all love our scarves anway, just look at these happy faces:


Tuesday, November 9, 2010

~ Pattern Designs & TCK KAL Nov 2010 ~


As most of you know I have been a bit behind with getting my patterns up and out there. Theres has been so much going on  personally with family and friends and with temping that I'm sorry to say knitting took second string, but over the last while these patterns have all been uploaded and are now going through the last few tweaks. I have to say, I had no idea how much work it would take to link a few sites together and those of you who know me personally, know that I lack website design skills, but thanks to a lot of work by whirl123  (and a very steep learning curve for me)  we are almost there and updates will be announced through TCK website. 


For those of you taking part in the November KAL for the Lace Ribbon Scarf on the constant knitter forums,
you know that I had to step down from running it due to my mums health and the lovely chicwithstix took over along with the constant knitter herself and they are both doing a wonderful job. Sadly my scarf is only on its third repeat  as you can see but I just can't seem to get into this project. I know ye have assured me that the more you do the more addictive this knit gets but I say thats because you don't live with a destructo-bunny and its obsessed male owner!!!! I was on my third repeat which I had to rip back as my lovely bunny and BF were having races up and down our living room floor.

now I think I have rambled on long enough and I am off for that cuppa and some peace and quiet knitting.

Tuesday, August 3, 2010

~ Haze Shrug - Take Two ~


Yes I decided to adapt my Haze Shrug as I put up earlier and I made this one from sock yarn. I will be posting the pattern soon but here are some rough pics to wet your apatite. I love how this feels and I love how it changes colour depending on the light I tried to show that here..Enjoy.

Saturday, June 19, 2010

~ Angel Hairband ~


A week with no sleep or waking up early with this weather is going to make anyone crazy. So after my second week in a row of bad sleeping, I decided to tire myself out (at 3 in the morning), with some rummaging in my yarn drawer and left over extras........ the result is the Angel hairband :) (I'm quite proud actually.)

There are a number of things you are going to need before you start this:


  • waste yarn or whatever you want your band colour to be
  • a pattern you like (I'll post mine on here)
  • elastic band or old hairband you want to cover
  • needles (I used 3.5 mm)
  • Needles for sewing or if your lucky to have it fabric glue
So to make the band, you measure the circumference of your head mine is 19 inches (aren't you all glad you know that). so is the length you want it to be. next choose a width, I choose 2 inches. Now check the pattern you want against your measurements and see if they are compatible or swap needles till they are. The pattern I used is as follows:

  1. I cast on 21 stitches (5 stitches to allow me to wrap over my elastic band and 16 stitches for my pattern). For your stitches here count your pattern and how wide your band is and use plain stitches for the width of your band.
  2. For the first 5 stitches on either side, I knit or purl depending on if its the rs or ws. The rest follow the pattern below which was on a really really old and badly photocopied school jumper pattern, but I like it.
  3. When its long enough cast off with a long tail. 
  4. Block (if a lace pattern is used).
  5. Now wrap the  plain knitted stitches around the elastic and seem up on the wrong side, being careful not to sew into the band just the knitted piece.  If using a hairband just fold over those stitches until you can slide your band though.
  6. Sew the elastic together, followed by the knittned piece to form a round. TA!!!!!DA!!! your done :)
Pattern: 
(16 sts and 15 row repeat)

1st row (rs): k5, yo, sl 1, k1, psso, k2, yo, sl 1, k1, psso, k5.

2nd and every alternative row: Purl.

3rd row: k3, K2 tog, yo, k1, yo, sl1, k1, psso, k2, yo, sl 1, k1, psso, k4. 

5th row: k2, k2tog, yo, k3, yo, sl 1, k1, psso, k2, yo, sl 1, k1, psso, k3.

7th row: k1, k2tog, yo, k2, k2tog, yo, k1, yo, sl1, k1, psso, k2, yo, sl 1, k1, psso, k2. 

9th row: K2tog, yo, k2, k2tog, yo, k3, yo, sl 1, k1, psso, k2, yo, sl1, k1, psso, k1.

11th row: K2, yo, sl 1, k1, psso, k2, yo, sl 1, k1, psso, yo, k2tog, yo, k2, k2tog, yo, k2tog.

13th row: K3. yo, sl1, k1, psso, k2, yo, sl1, k2tog, psso, yo, k2, k2tog, yo, k2.

15th row: K4, yo, sl1, k1, psso, k2, yo, sl1, k1, k2tog, yo, k3.  

enjoy :)


Friday, June 11, 2010

~ Haze Shrug ~


 update: you can now find the pattern for download over here


I wanted a quick knit to cover the top of my black dress at the back. I decided to see what my scribble mitt pattern would look like with lace weight yarn and to my surprise it looks GREAT. I have to say another big thank you to Rosemary for the wool, you were right it looks amazing. For those of you interested I bought the yarn here.

 I cast on 40 stitches but I am really petite, If I was doing this again I would use a minimum of 52 stitches, the pattern is worked over 3 + 1 stitches so you can adapt it for yourself. 

1. I did 10 rows of seed stitch on 5.5mm needles, with a long tail cast on.

2. I changed to 8 mm needles and carried out the pattern here for my scribble mitts: http://tbunny.blogspot.com/2010/06/scribble-mitts.html

3. When it reached from shoulder to shoulder across my back, I changed back again to size 5.5mm needles and did 10 rows of seed stitch again. (If you want longer sleeves, just continue for the length required and sow in the ends a little longer. This does adapt to a bell short sleeve well)

4. cast off and leave a long tail.

5. The area that has the seed stitch and the first two rows of pattern you sow in with the cast off tails on either side. and ta da there you go a shrug made in a day :) Don't forget to block I steamed blocked it as I wanted to wear it the day I made it.

Hope this helps, I will post a proper one soon, im really hungry.


Thursday, June 10, 2010

~ Scribble Mitts ~

After finishing my scribble scarf, I was left with one ball of the Eskimo chunky wool  and some time to play with (as my dads train was running late) so off I went, I found a really old pattern from my school days that had a diagonal trellis effect and I wanted this but only on one side and so the Scribbble Mitts were born. This is a really easy pattern to follow for those of you interested I have posted it below. This wool makes the pattern a lot more complicated looking then it is, so if you are repeating this with plain yarn the effect will be quiet different.


The Pattern:
Note: when knitting across the row make sure your knitting into the back of all of the stitches, esp if using this pattern for the haze shrug.

1. This pattern was worked over 4 stitches. I cast on 20 stitches with a long tail cast on. 

2. Knit across the row.

3. P1, *Purl 3 stitches together keeping them on the left needle, yo, and Purl the same 3 stitches again, P1*. (This produces a fake star like pattern). Repeat * this to last 3 sts Purl 3 stitches together keeping them on the left needle, yo, and Purl the same 3 stitches again.

4. Knit across the row being careful to knit all the stitches and yo.

5. P3, Purl 3 stitches together keeping them on the left needle, yo, and Purl the same 3 stitches again.*p1,Purl 3 stitches together keeping them on the left needle, yo, and Purl the same 3 stitches again* repeat * To last 2 stitches and P2.

Just repeat these rows until the desired length is reached.

6. How you finish them is up to you. I finished on a knit row and turned and instead of purling while casting off I knitted, giving a chunkier edge because I always end up ripping my mitts at the top, while I'm out or running onto a bus or something stupid. Remember to leave a tail while casting off.

7.  To sew these mitts I just used the tail from the cast on and cast off to sew up the sides with the reverse side side facing out. Leaving a gap for my thumb. Woot!! here you have some quick individual finished mitts. 


I hope this entertained you for a hour or two. Best of Luck if you try them.  

Wednesday, June 9, 2010

~ Rivendell- A Wrap for Someone Special! ~


Rivendell was my first attempt at designing. I wanted something that had meaning for the person I was making it for and low and behold (after a few false starts) Rivendell was born. Lots of people have asked me where I started with this and it really was a combination of a few things. I have a pattern book called "The Ultimate Sourcebook of Knitting and Crochet Stitches" by Harmony Guides which I flicked through (again with a cup of tea in tow) and I liked some of the panel patterns unfortunately none of them was quiet what I was looking for.  I wanted some with a Celtic feel but gave an elegant neckline and drew your attention to the persons face.


I also liked the versatility of the "highlander" type stole I had made previously, so I came up with this beauty. I made it holding the cygnet grey mix yarn double stranded for warmth and I introduced a crossing cable at either edge. I also started an insert panel but did not allow this to evlove into a cabling pattern untill after the first 20 or so rows. This gave a river like effect to the cabling on either end, slow to start but quiet busy and fast in the middle. This also did not pull the wrap too tight at the edges allow the width of the wrap to be used fully. There are also some eyelet type stitches in here either side of the panel insert. I have to say I really really didnt want to give this away when it was finished. 

Please do not let the bad photos fool you, this was actually lovely to wear and suited the girl really, really well. It was made for a dress and to hide a pregnancy bump and it worked :) It works into a nice scarf too as well as a wrap or a stole. I did pull my hair out a little on the false starts but once I had decided on what it was I wanted it was easy :)